Windows Printing in Halligan Hall is actually quite simple….unless you don’t have a Windows machine, of course.
So long as you’re on the EECS/Halligan network, either through wired Ethernet or the ‘tufts_eecs’ Wi-Fi network, your Windows machine is ready to connect to any number of printers in our building. We’ll outline a few methods for connecting below.
Connecting Via File Explorer
- Open any File Explorer Window (My Documents, your Z drive, anything).

- Select the Navigation Bar and type the following without quotes: “\\winprint\”
- Press Enter
💡 Note: If you are not on a domain joined computer (i.e a personal computer), it will ask for your EECS credentials. Input “hlgn\” before your username in the username field.
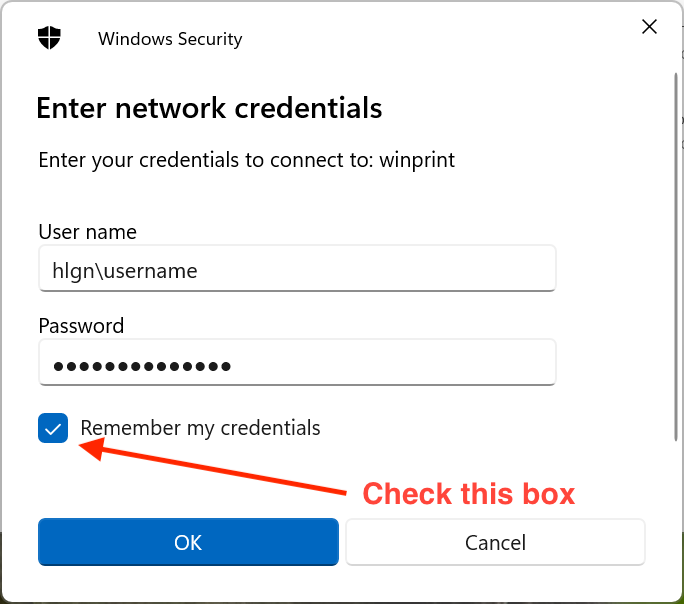
Check the box to save the credentials, or you may run into error messages stating “The credentials supplied are not sufficient to access this printer”
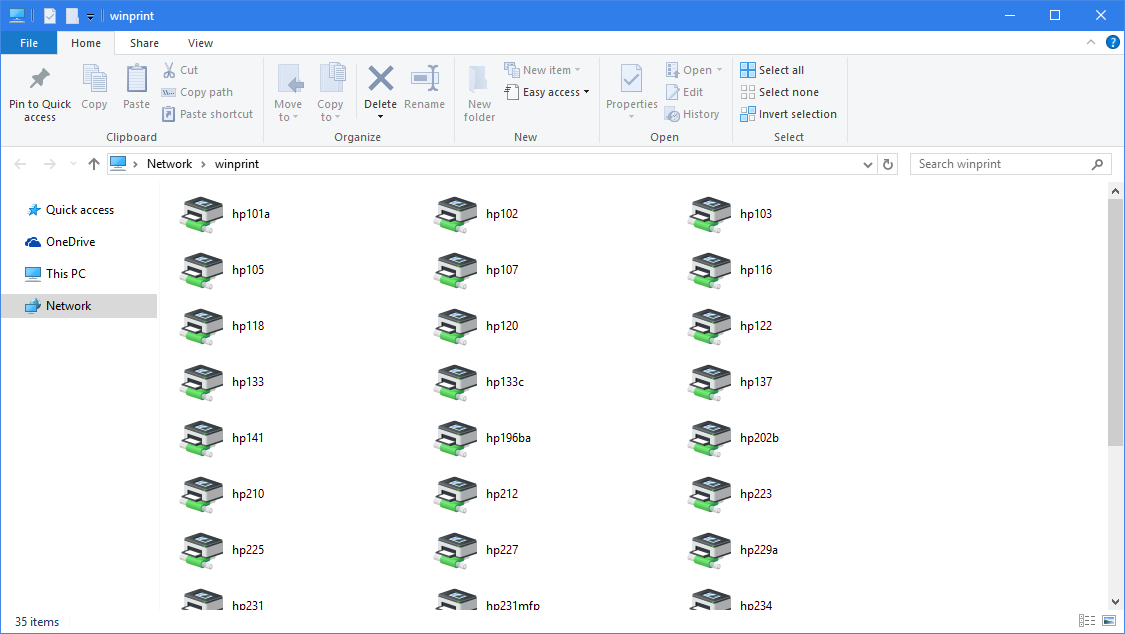
4. You will be shown a list of all the printers in the building available to you. The CS Front Office has two Canon printers: canon420a, which is the main big printer immediately visible to the left when you walk in, and canon420, which is found further down to the left. Lab printers are also available to add from the \\winprint server.
5. Either double-click or right-click and press “Connect” on any of the printers.
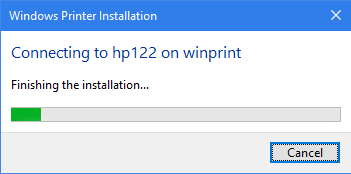
6. The computer will install the necessary drivers for the printer and complete. You’re all set!
Connecting Via the Start Menu
This is the quickest and simplest way to connect to an EECS printer, but can be a little unreliable (details below).
- Open your Start Menu
- Type the following in the search bar on the bottom: \\winprint\
- Press Enter
- A new File Explorer will show you a list of all available printers. (See Above Step 4 above for image reference)
- Either double-click or right-click and press “Connect” on any of the printers. (See Step 5 above for image reference)
- The computer will install the necessary drivers for the printer and complete. You’re all set!
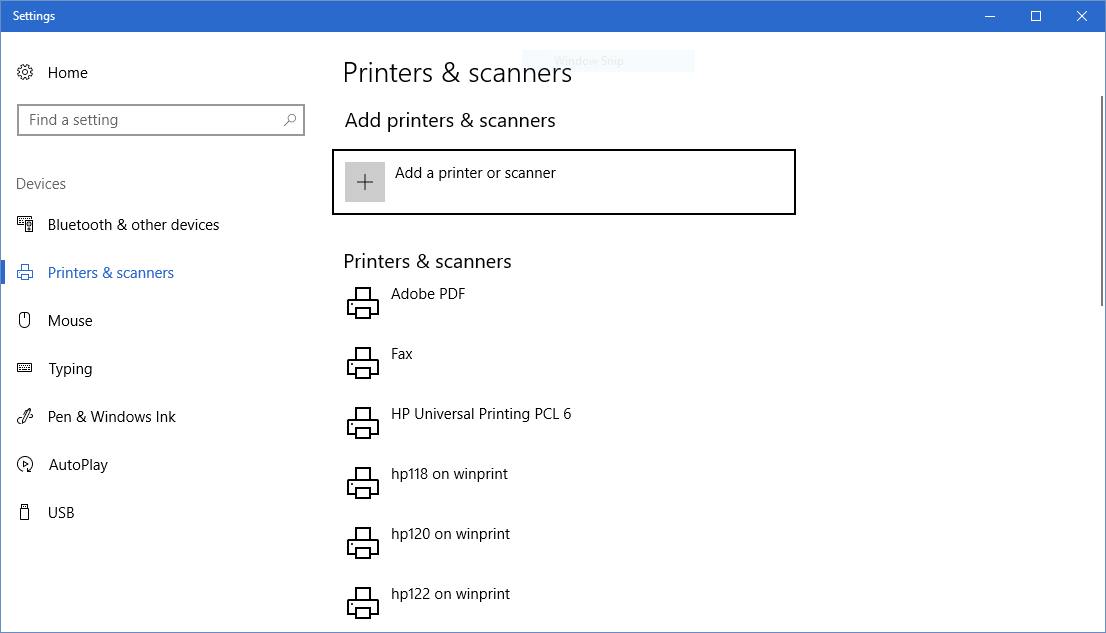
Connecting Via the “Printers and Scanners” Menu (Windows 10)
If you prefer to connect by using the built-in Windows Add/Remove Printers menu, you may do so as follows:
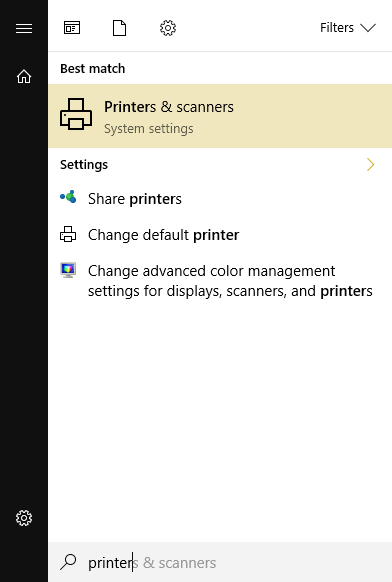
- Open the start menu, type “Printers” and select the “Printers and Scanners” option. This will open a new window.
- Select “Add Printer” at the top of the menu and wait for the list to propagate.
- In the list of printers, search for the one you would like to add. If it is there, great! Select it and you are done. If not, please continue to Step 4.
- At the bottom of the list, you will see an option stating “The printer that I want isn’t listed” – Click This

- In the Find a Printer By Other Options box that opens, choose Select a shared printer by name
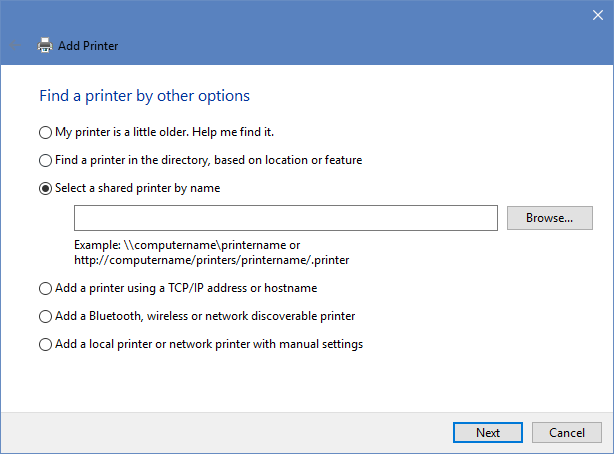
- In the empty box, type \\winprint\ – As soon as you enter the trailing “\”, a list of all available printers should appear.
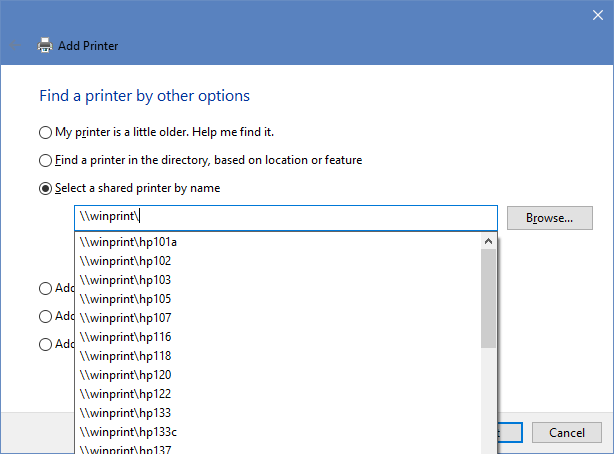
- Select the printer you would like to connect to and press “Next”
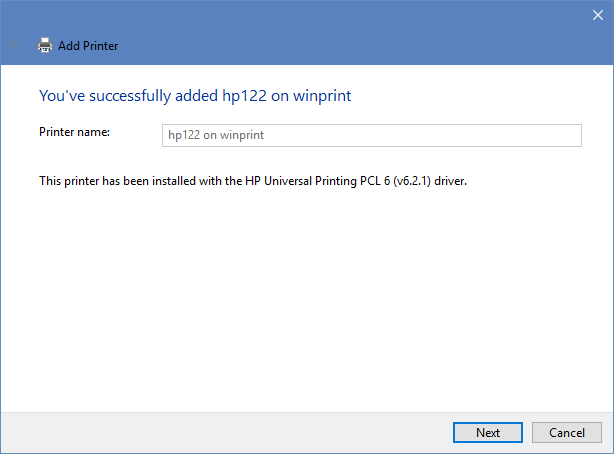
- The computer will connect to the printer, install necessary drivers, and tell you when it has finished. You’re all set!
Troubleshooting:
If you are on a non-domain joined computer (personal computer), and you still have issues with credentials, you may need to add them manually to the credentials store.- In the Start Menu Search Bar, type in ‘Windows Credentials’ and click on ‘Manage Windows Credentials

- Next, click on ‘Add a Windows credential’

- In ‘Internet or network address’ field, input ‘winprint’. In the ‘User Name’ field, input ‘hlgn\’ followed by your EECS account username. In the password field, input your EECS account password in the password field. Then click the ‘OK’ button

- In the Start Menu Search Bar, type in ‘Windows Credentials’ and click on ‘Manage Windows Credentials