Tufts EECS Systems Information

  • Home
  • Account Information
    • Managing Your Password
    • Home Directories, Quotas, and SMB Mounts
    • Personal Web Space
    • Your Account After Graduation
  • Email
    • Configuring Email
      • Outlook
      • Thunderbird
    • Forwarding Mail
    • Spam and Virus Filtering
  • Remote Access
    • Accessing the EECS VPN
      • Using Pulse Secure
    • Secure Shell (SSH)
    • X11 Forwarding
    • Server Information
    • Secure File Transfer
    • VMware
      • VMware – Remote Console
      • VMware – Creating a Virtual Machine
      • VMware – Horizon
  • Web Tools
    • Account Reset
    • Webmail
    • Mailman
    • Logging Into G Suite
    • GitLab
      • GitLab
      • Importing from GitHub to GitLab
    • Software Installation (Linux)
      • Commercial Software
      • General Software Installation
      • Installing Heroku
  • Software
    • Windows Lab Software
    • Linux Lab Software
  • Lab Information
    • Hours/Locations
    • Software
      • Windows Lab Software
      • Linux Lab Software
  • Printing
    • Mac Printing
    • Windows Printing
    • Unix Printing
  • Tutorials/Help
    • Adobe
      • Using Adobe Creative Cloud
      • Adobe Acrobat Digital Signatures
    • Linux
      • Cleaning Your Home Directory
      • File Manipulation
      • File Recovery (Linux)
      • Firefox Won’t Start (Linux)
    • Education Technology
      • Using Gradescope
      • Useful Applications
    • User Lookup
    • Unix File System
  • FAQ

Adobe Acrobat Digital Signatures

Creating a New Digital Signing ID

  1. Open Adobe Acrobat XI, select the “Edit” menu bar, and open Preferences.
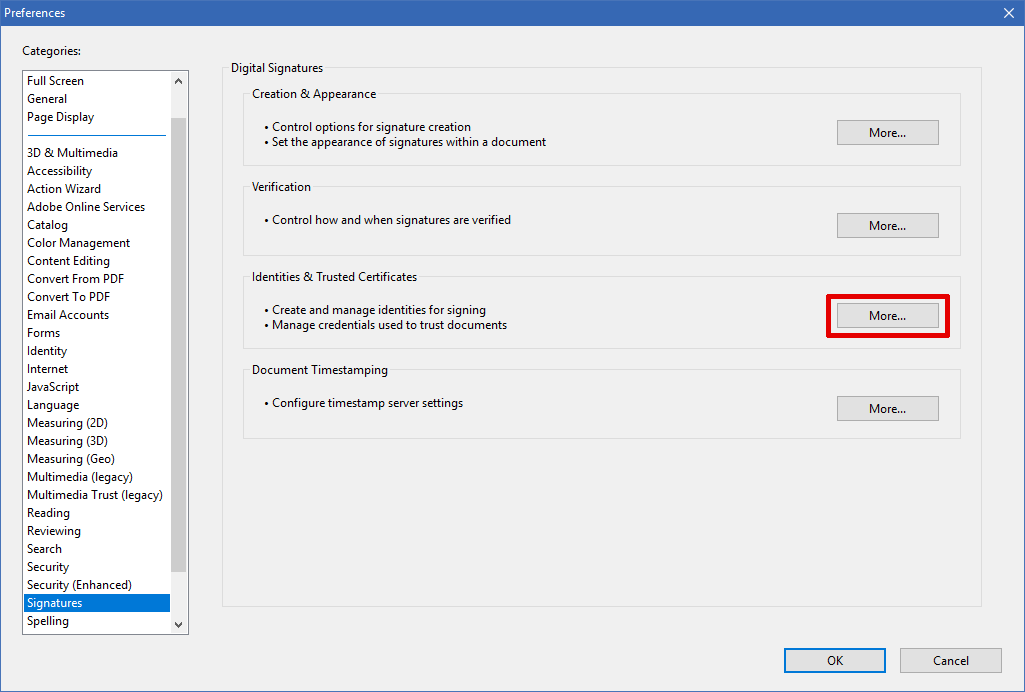
  2. In the Preferences menu, select Signatures in the left column.
  3. In the Signatures section, select More… under Identities & Trusted Certificates, as shown below:
    Signature Preferences
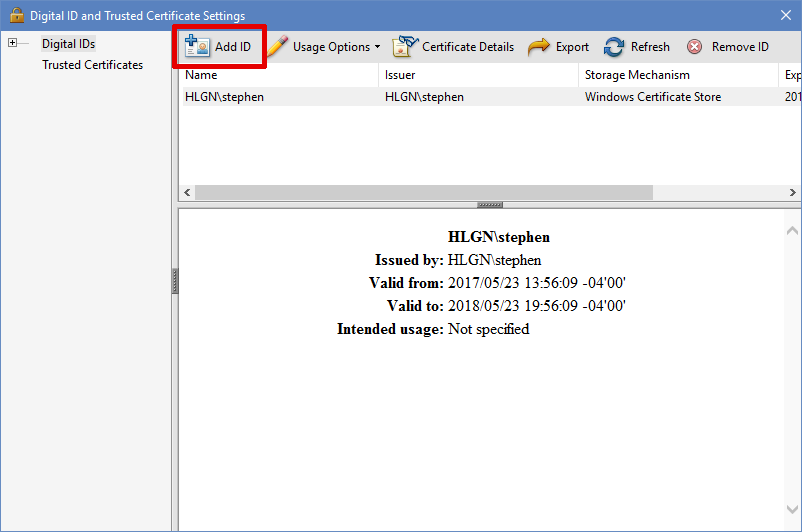
  4. The Digital ID and Trusted Certificate Settings dialog box will open. Select Add ID from the top menu bar, as shown:
    Digital ID Settings
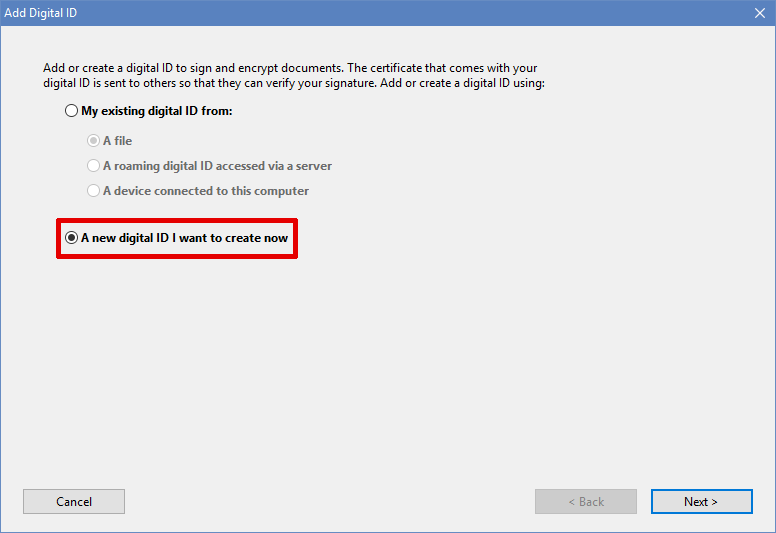
  5. Select “A new digital ID I want to create now” and press Next
    Add Digital ID-1
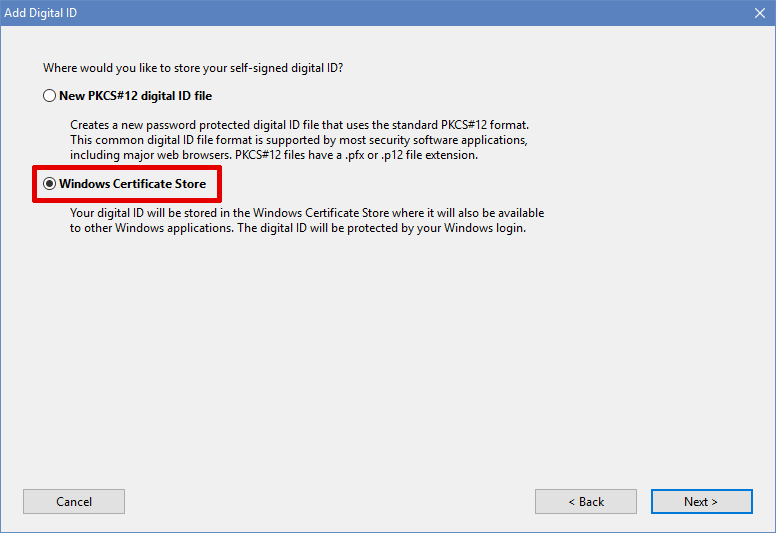
  6. If on Windows, select “Windows Certificate Store” and press Next
    Add Digital ID-2
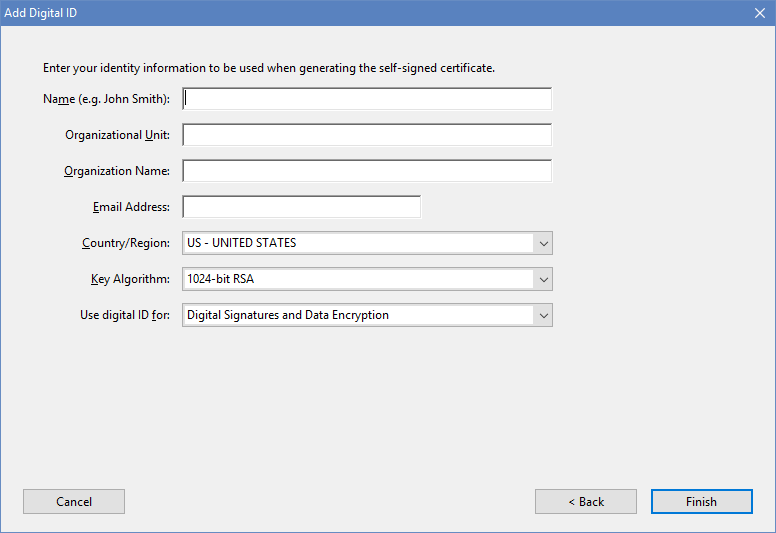
  7. Enter your appropriate information and select Finish (you may leave “Organizational Unit” blank)
    Add Digital ID-3
  8. That’s it! You’ve created your own personal Digital Signature, which is linked to your Windows logon.


Inserting Your Signing ID Into a PDF

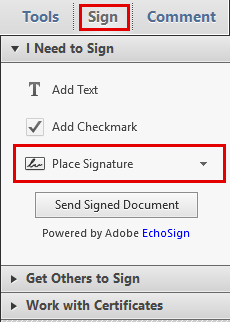
  1. Now that we have our Digital Signature (see above), let’s place it into a Document. In the top-right corner you should see a Tools | Sign | Comment section, select Sign and then Place Signature
    Sign-Tab
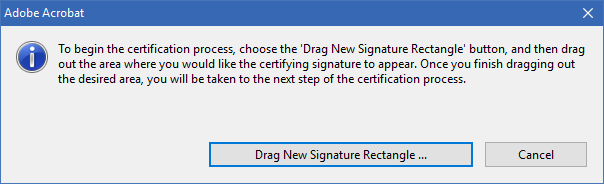
  2. The “Drag New Signature Rectangle” box appears, select Drag New Signature Rectangle…
    Drag New Signature
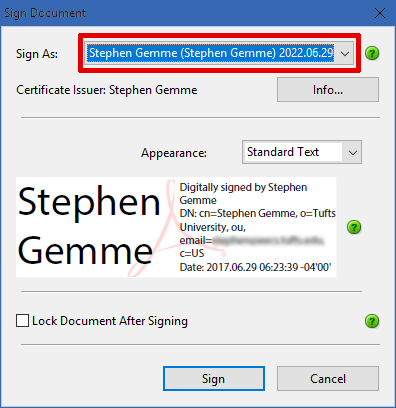
  3. Create your signature box as needed, and when you finish dragging, the Sign Document box will appear. Select the signature in the Sign As box that we created above.
    • Note: You can also select New ID… from this menu to bring up the Add Digital ID wizard instead of going through the Preferences as highlighted above.
      Drag New Signature-2
  4. Your signature will be placed in the signature box you just created, and it will look something like this:
    Signature
  5.  A verification box will appear at the top of the document, as shown:
    Signed Validation
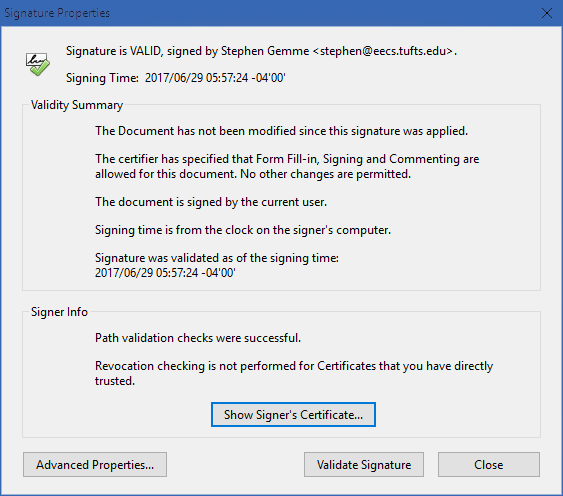
  6. You’re done! If you would like to see the properties of the signature, you may click it and select “Signature Properties” to see the following:
    Signature Properties

Remote Access

  • Accessing the EECS VPN
  • Using Pulse Secure
  • Server Information
  • Secure Shell (SSH)
  • X11 Forwarding
  • Secure File Transfer

Software Installation

  • Commercial Software
  • General Software Installation
  • Installing Heroku

Tufts Support

  • Tufts Tools
  • Tufts IT Department
  • SIS Portal
  • Tufts Email

Copyright © 2025 · Log in