If you’ve been granted your own personal space and would like to create/manage your own VMs, please follow the below steps to get started with creating your first Virtual Machine!
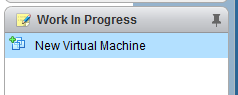
Note: At any point during the VM creation, you may press the >> button in the top-right of the screen to place your window in the “Work in Progress” section. This will allow you to retrieve it later and resume from where you left.
- Like above, go to vmware.eecs.tufts.edu and sign into the web console with your EECS credentials.
- Navigate to your resource pool that contains your VMs (if any) in Hosts and Clusters
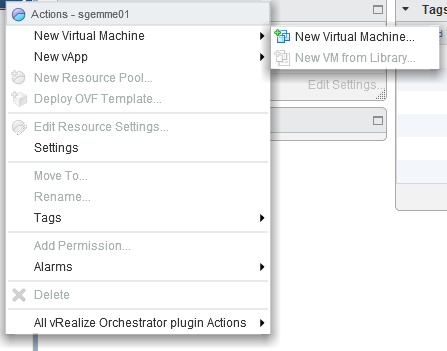
- Right-Click the resource pool with your username and select “New Virtual Machine”
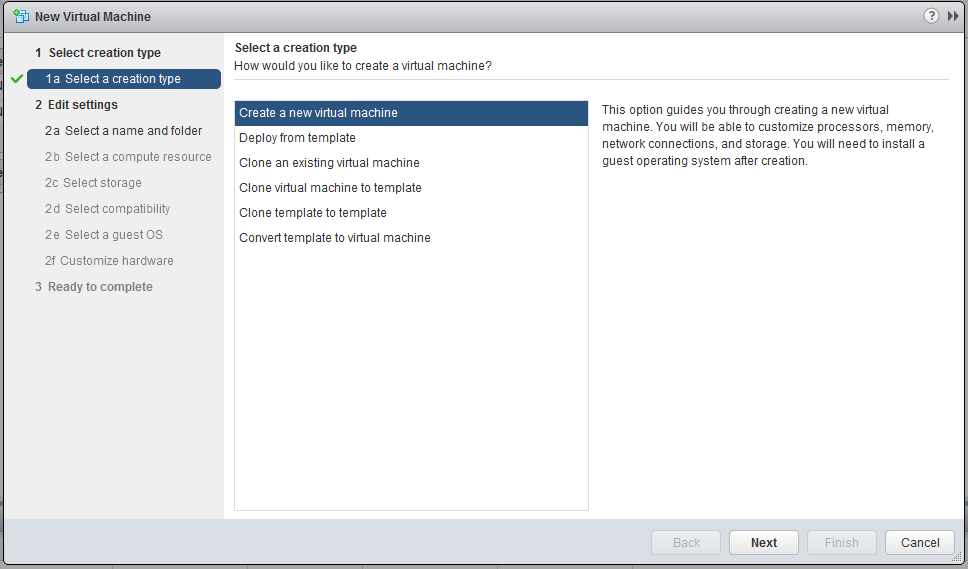
- On the screen that pops up, leave the default selected “Create a new virtual machine” and press Next
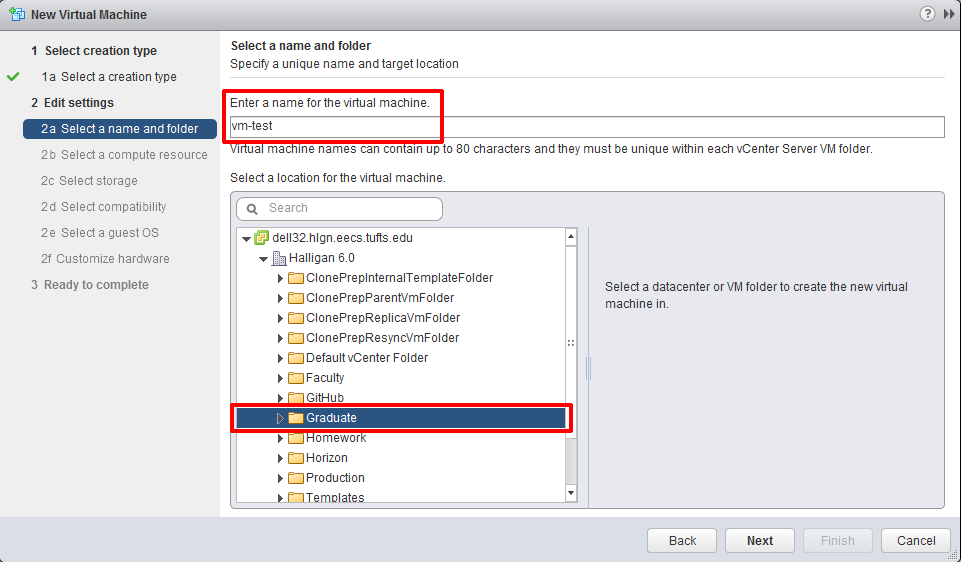
- Choose a name for your virtual machine, and navigate down the menu to select the “Graduate” folder for the location.
- Do not make any changes to the “Select a compute resource” – Your username should automatically have been selected. Changing this will put the VM somewhere you can’t access.
- Note: if there are any errors/warnings in the Compatibility section, please email staff@eecs.tufts.edu with any information it provides.
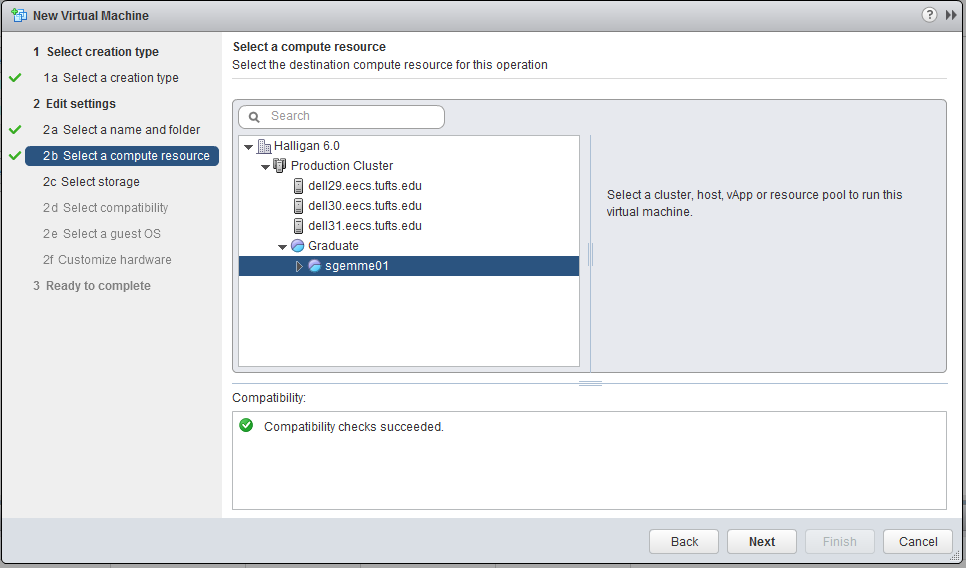
- Note: if there are any errors/warnings in the Compatibility section, please email staff@eecs.tufts.edu with any information it provides.
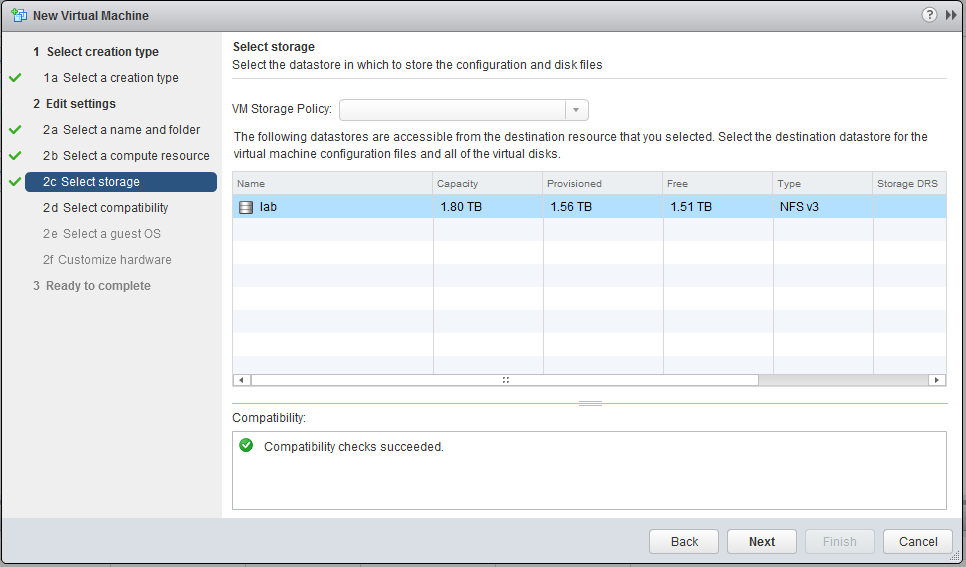
- On the “Select storage” page, your only option should be “lab” – this is what we want.
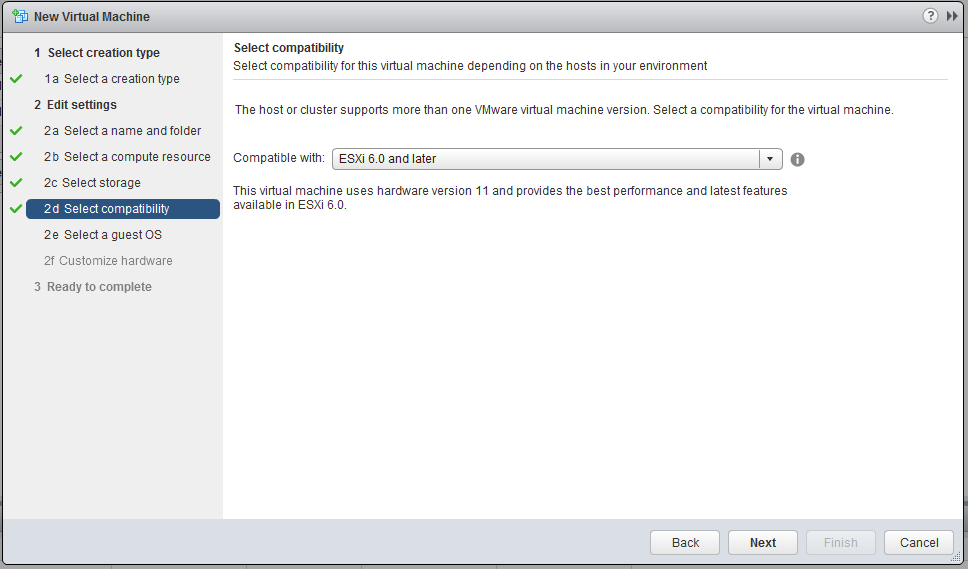
- Leave the defaults on the “Select compatibility” page and press Next
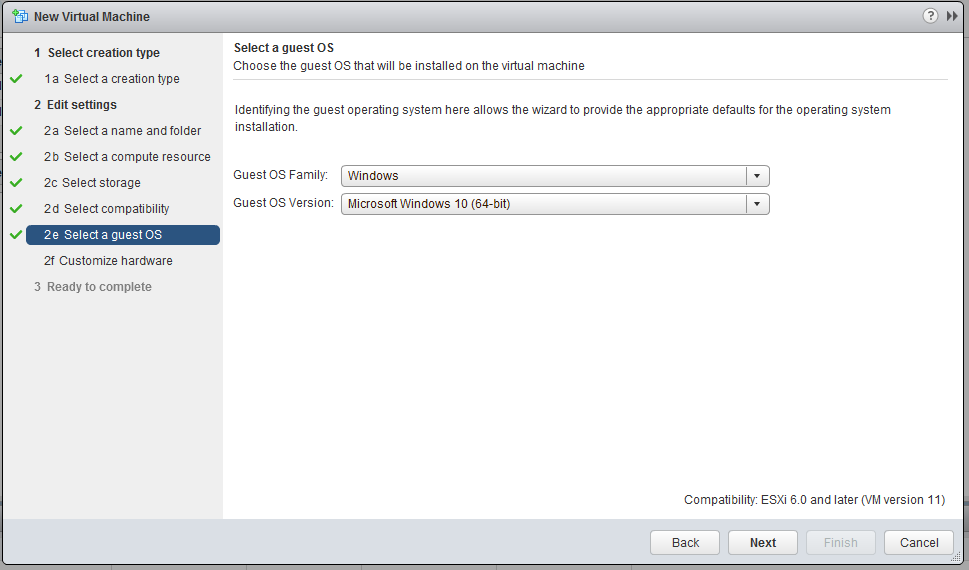
- Choose the appropriate operating system on the “Select a guest OS” page – this is more for your record than anything else.
- The “Customize hardware” page will now appear. There’s a lot you can play with, but we STRONGLY recommend only touching CPU, Memory, and Hard Disk (and network, if necessary).
- Note: For CPUs, please note that the *CPU means cores, and if you expand that menu you see “Cores per Socket (*)”. We highly recommend using as few Sockets as possible – meaning, put as many cores on a socket as you can, rather than having only 1 or 2. This results in better performance.

- Memory is controlled by your administrator. There is only so much total memory that you may use for your whole resource pool. Please be mindful of how much memory is allocated to your other VMs.

- Hard Disk space is something that can be added quite easily at a later point, please be mindful how much you allocate since you can always add more, but not remove.

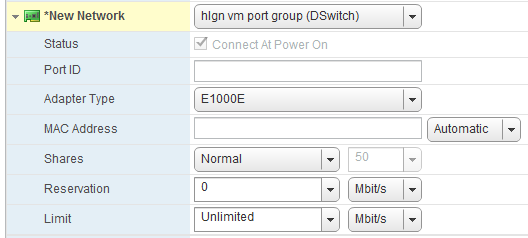
- We have many networks to choose from, but most are for testing purposes. The one you want is “hlgn vm port group (DSwitch)” which will place it on our main 10.3 network.
- Note: If you would like your VM to be given a static DHCP address with a specified hostname, please create the VM on the ‘vm port group’ network as specified above, and forward the request with the VM’s name and MAC Address to staff@eecs.tufts.edu.
- Note: For CPUs, please note that the *CPU means cores, and if you expand that menu you see “Cores per Socket (*)”. We highly recommend using as few Sockets as possible – meaning, put as many cores on a socket as you can, rather than having only 1 or 2. This results in better performance.
- Review your choices and press Finish if things look good.
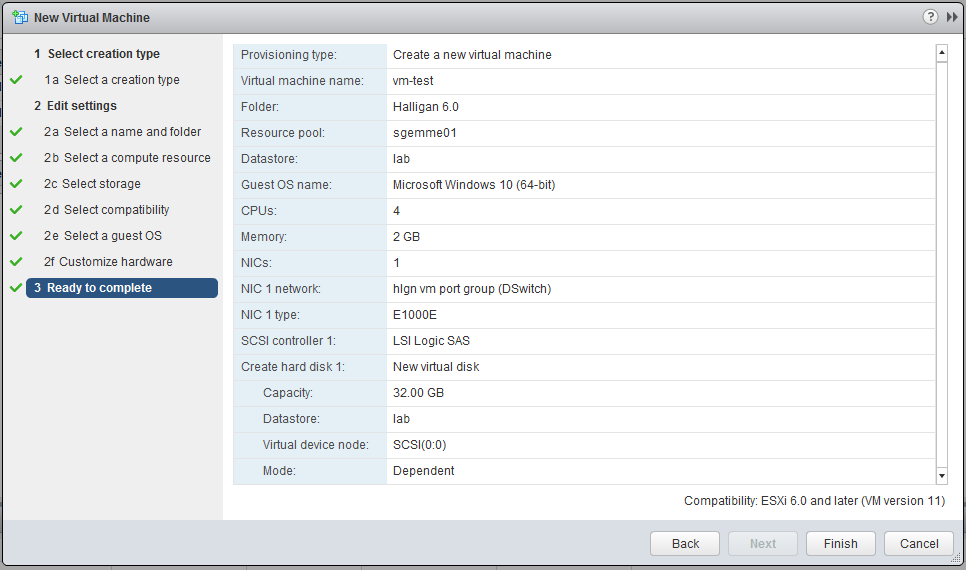
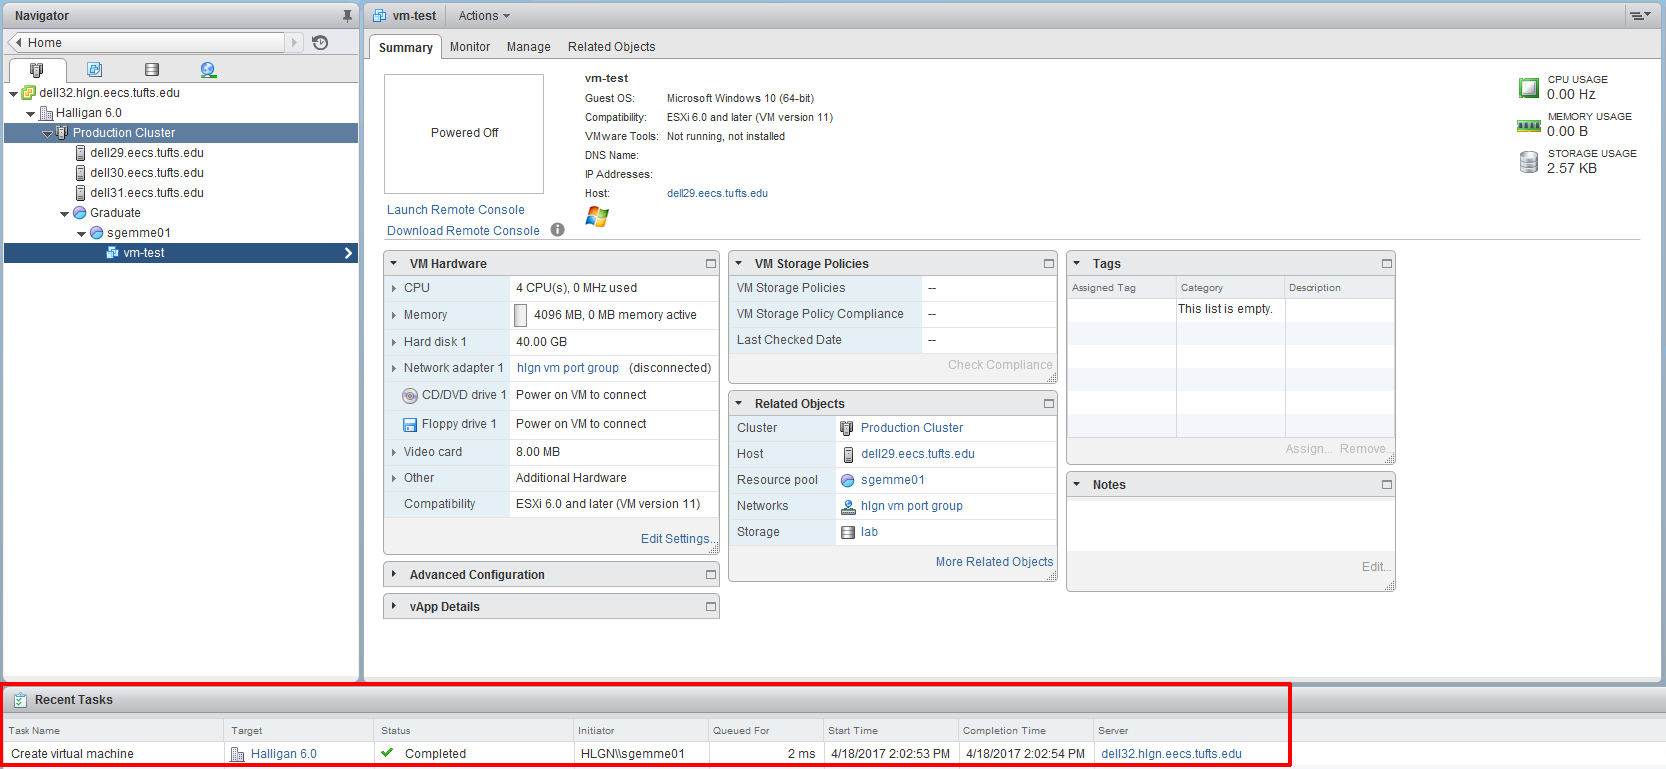
- When you are done, your VM’s summary page will appear and a message will appear in the bottom “Recent Tasks” window to show the progress of your new VM.